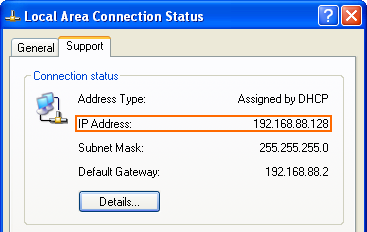
How To Determine the Local IP Address of a Windows Computer
Two methods for finding the local IP address of a windows computer.
Command Prompt Method
While screenshots from Windows 7 are used for illustrations the steps are the same for Windows XP.
Step 1 - Open a Command Prompt
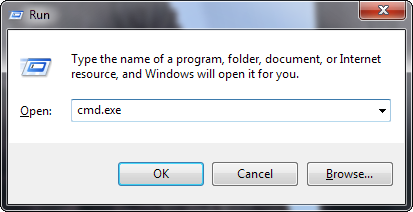 A quick and easy way to open a command prompt is to open the run dialog by pressing Windows Key + R. Type "cmd.exe" (without quotes) into the dialog and press they Enter key or the OK button. An alternative is to navigate the Start Menu to All Programs - Accessories - Command Prompt.
Step 2 - Run the ipconfig Command
 Type "ipconfig" (without quotes) into the command prompt and press the Enter key.
Step 3 - Interpret the Results
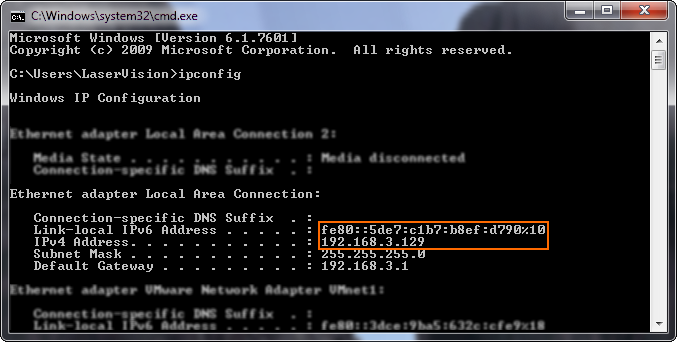 The ipconfig command gives a large amount of data, fortunately the local IP address of the computer is close to the top. Using the scrollbar on the right of the command prompt window scroll to the top of the output. Look for the heading "Ethernet adapter Local Area Connection", note that there may be more than one Ethernet adapter on your computer. Under this heading are the IPv4 and IPv6 addresses (orange box).
Control Panel Method
Windows 7
Step 1 - Open the Control Panel and select Network and Sharing Center
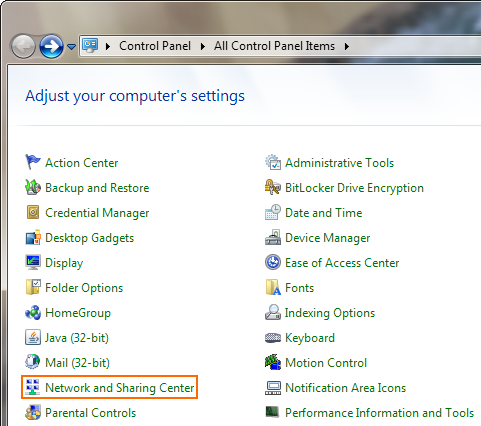
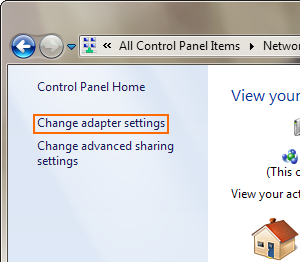
Step 2 - Click Change adapter settings
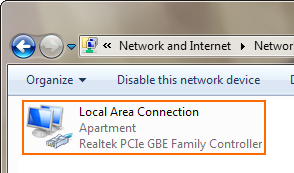
Step 3 - Double-click Local Area Connection
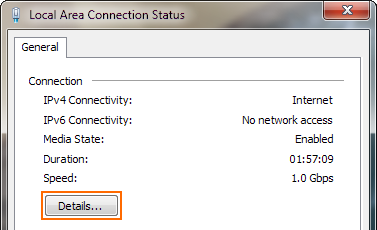
Step 4 - Click Details on the status dialog
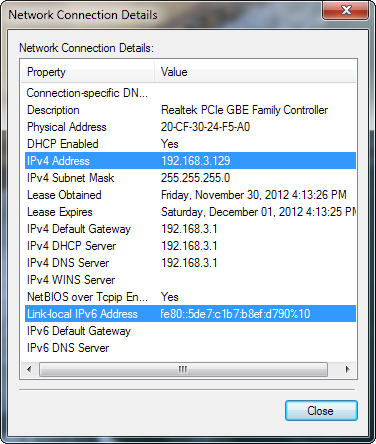
Step 5 - Read the local IPv4 and/or IPv6 address(es) (highlighted)
Windows XP
This method only works to find the local IPv4 address.
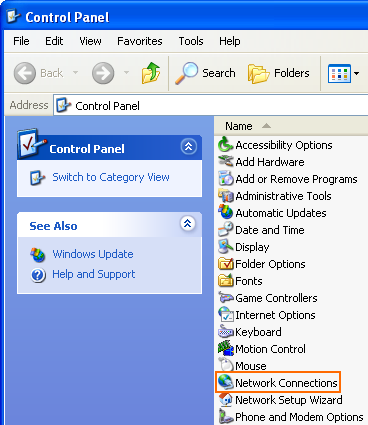
Step 1 - Open the Control Panel and double-click Network Connections
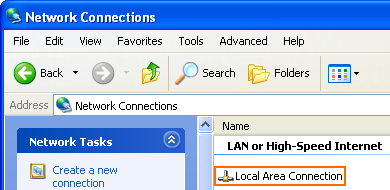
Step 2 - Double-click Local Area Connection
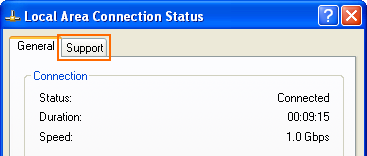
Step 3 - Click the Support tab at the top of the dialog
Step 4 - Read the local IPv4 address
